I've decided I'm obsessed with rhinestones, and they are the best thing since sliced bread!
So I went a bit overboard this weekend creating a whole stack of cards, just to have on hand. I created many multiples and they were easy to create and recreate- so excellent KISS cards
Enjoy!!!
Saturday 16 August 2014
Sunday 3 August 2014
Crazy Crafters Blog Hop~ Stampin Up Colour Combos!
Welcome again to our Crazy Crafters Blog Hop!! This month we looked at Colour Combos! You should have just left the oh so inspiring Michelle Mills from Hello Day Cards, if you have you are in the right spot. If you are joining the blog hop for the first time, after my project will be a list of all of the awesome members of the blog hop, so be sure to check out their projects too!! This month was really hard because I have so many favourite colour combos and what made it even harder was having to choose one off the Stampin' Up's Pinterest Board, so I chose this one....

Now I am a HUGE fan of pinks! I love them! In fact when I was planning out my ink pad purchases before becoming a Stampin' Up demonstrator, having pink in the colour collection was a very important influence in my purchases. This is not a colour combo I would use a lot though. I don't use a combination of many colours, so to make this work I chose a project that I knew I would be making a lot of at the end of the year..... Personalised Notepads!
I love doing things for my students at the end of the year, and settled on making little personalised notepads for them to take onto Secondary School or bring back for their work next year, so here it is!
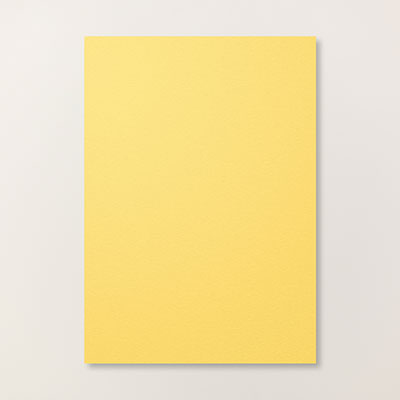
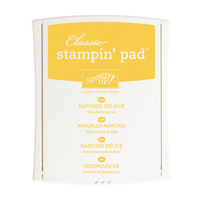
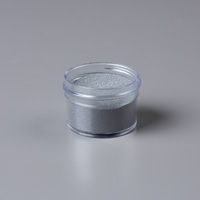
So basically I was also inspired by Sam Hammond Donald from Pootles Papercraft in the UK. The basis of the project is to buy just a ordinary, lined note pad (I used an A5 sized notepad, but you can use any size); measure the length, width and depth of the notepad to get your measurements; and then decorate accordingly! I used a base of Daffodil Delight cardstock, matted that with a piece of Strawberry Slush cardstock 1/4" smaller than the base, and then made mats for the stamped name and stamped feature. The feature is stamped in Strawberry Slush ink onto Whisper White card using the Flowering Flourishes stamp set. The name was stamped in Versamark ink and coated with Silver Embossing powder. I stamped the name in the Notable Alphabet that is now retired. I decorated the name with stamped images using Daffodil Delight ink and Rhinestones. I also punched out some flowers out of the same cardstock using the Petite Petals punch to add some extra dimension. I adhered these using glue dots. I used Fast Fuse to adhere it all together, except the name which I popped up on dimensionals! The silver embossing and rhinestones give touches of silver, I didn't want any of the colours to over power each other.
Now I'm going to be the first to admit that I don't think this is perfect. After battling with the name and having to redo it three times, I wasn't going to redo it again... I thought it would look better with some sponging... I was wrong! BUT I wasn't going to redo all my Whisper White pieces again, so I've left it in. I felt it needed something else, the sponging around the edges wasn't it. It's only subtle so it's not a huge deal for me!
Although I plan to do smaller ones for my students, but the basis of the project is the same. Click below to view the video from Sam from Pootles Papercraft; Notebook Tutorial, she is just brilliant and she deserves the credit for the inspiration of this project!!! Any questions, please email me at laura_jane28@hotmail.com or leave a comment below! Your next stop on the blog hop is to visit the equally talented Sarah Rae Oakes at Stampin' Up! with Sarah..! Enjoy
Laura xx
Blog Hop List
Carolina Evans at Studio Evans
Angela Lorenz at Angs Crafty Cards
Nicole Spicer at Handmade By Nicole Spicer
Michelle Mills at Hello Day Cards
Laura Britten at Stamping with Laura Jane
Sarah Rae Oakes at Stampin' Up! with Sarah
Karen Coulter at Do Lally Crafts
Kylie Bertucci at Crafty Kylie
Sue Wdowik at Nigh Nigh Birdie
Rose Desmond at Stamping with Rosalie
Petra Tailor at Tailored Craftiness
Tamie Holt at Tamie Luvs Craft 2
Distress Ink Glitter Technique
Ok so I just made up a name for what I did, it is a combination of lots of different techniques but the result is just beautiful!!
Let me know what you think, I think they are just gorgeous, and are really simple cards that you can mass produce! Simply ink a piece of watercolour paper (I used Ranger branded Watercolour paper) with distress inks. Very important that you use distress inks as they react with water! When you have inked the whole piece, spritz with some water (as little or as much as you like). Then let dry. You can dry with a heat tool, if you blot the water off, you get a muted look like the orange one directly below this writing. I wasn't as thrilled with this as you don't get pretty little ink outlines from the pools of water. When it is completely dry, coat with Versamark ink by smooshing your inkpad over the whole piece of paper. Coat with a glittery embossing powder (I used Iridescent Ice emboss powder from Stampin' Up!) and heat set the powder. I used black paper with white embossed sentiments to embellish without taking away from the inked paper, which is the focal point. I used off cuts from the same pieces of paper to add a little something because it did need just a little something extra. But kept it simple. Popped it up with dimensionals and put onto a Stampin Up Naturals Ivory cardbase.
Let me know what you think, I think they are just gorgeous, and are really simple cards that you can mass produce! Simply ink a piece of watercolour paper (I used Ranger branded Watercolour paper) with distress inks. Very important that you use distress inks as they react with water! When you have inked the whole piece, spritz with some water (as little or as much as you like). Then let dry. You can dry with a heat tool, if you blot the water off, you get a muted look like the orange one directly below this writing. I wasn't as thrilled with this as you don't get pretty little ink outlines from the pools of water. When it is completely dry, coat with Versamark ink by smooshing your inkpad over the whole piece of paper. Coat with a glittery embossing powder (I used Iridescent Ice emboss powder from Stampin' Up!) and heat set the powder. I used black paper with white embossed sentiments to embellish without taking away from the inked paper, which is the focal point. I used off cuts from the same pieces of paper to add a little something because it did need just a little something extra. But kept it simple. Popped it up with dimensionals and put onto a Stampin Up Naturals Ivory cardbase.
Subscribe to:
Posts (Atom)


